
Azure Front Door Service is a pretty new service added in the Azure ecosystem recently with some great features towards scalability, availability and security entry point for faster delivery of your global applications. It works at Layer 7 or HTTP/HTTPS layer and uses anycast protocol with split TCP and Microsoft's global network for improving global connectivity. The icing on the cake is it's support for WAF which is a must nowadays for any public facing applications.
In this article we won't go much into theory, rather dive straight into a hands-on demo where we would deploy one simple 'hello world' web application in two different Azure regions which are distant apart and would place an Azure Front Door service as a entry gate to achieve high availability and automatic fail-over in case of regional failure.
Region:
West US - Primary
West Europe - Secondary
Region:
West US - Primary
West Europe - Secondary
If you want to read more about this service and its advanced features you can always refer to the Microsoft documentation.
Please note that I have purposefully left out some complex areas
or haven’t gone deep into details somewhere. This is just to make this
article easy to follow and help as a quick launching pad for further exploration.
Prerequisites:


I do not need ApplicationInsights for this demo as hence disabled that feature in the "Monitoring" tab. Click "Review and create" and then "Create". This will kick-off the service creation process and our web app will be up and running in minutes.


Nothing great in the code. Just a simple hello world wish.


Notice the frontend host url. That is your front doors entry point to the backend world. You might get an 404 error if you hit the url as soon as it is created. Don't worry.. Wait for few moments as its takes some minutes to propagate the effect globally.
Hitting the front doors url multiple times will result in the same result. Our primary region is serving all the user request.
Now lets simulate a fail-over scenario. What if the West US region goes down? The Front Door should automatically fail over to the secondary region (in this case West Europe region) and serve the user request from there; thus ensuring high availability and disaster recovery. We have configured it to behave that way, right!
Go to the West US web app and stop the application. This will simulate the West US outage scenario which we are trying to accomplish.

Now go back to your Front Doors endpoint and hit refresh. You may see that it's still serving from the West US region. This is because the outage has not yet propagated globally. Wait for few minutes. Have patience, it's really quick. 😊
You will see that now the hello world message is getting served from the West Europe region.

Well Done! You have done everything right and the output is as expected. Mission Accomplished. 👍
Hope this article will help to have a good understanding on the Front Doors service and would encourage you to dig further. Do share with me about your experience and what you have built upon this foundation and also let me know if you want me to cover other areas of this service.
I would love to hear from you.
- Microsoft Visual Studio 2017 (Though you can try with VS2015, but this demo is on VS2017)
- Azure Subscription (Free subscription of 30 days will also do)
- Basic HTML programming knowledge.
Jump In: 👍
Lets create two App Service in Azure (one in West US and another in West Europe region).
- Login to Azure (If you do not have any subscription already then create one else login to your existing one)
- Search for "App Services' if it's not already pinned to your left blade.

- Create an web app and enter the basic information. Make sure you have selected the region as "West US". This is important. For other information you have your choice but I have suffixed as "-westus" for easy identification.

I do not need ApplicationInsights for this demo as hence disabled that feature in the "Monitoring" tab. Click "Review and create" and then "Create". This will kick-off the service creation process and our web app will be up and running in minutes.
Now let's create another app service. This time make sure you have selected the region as "West Europe". This is important. For other information you have your choice but I have suffixed as "-westeurope" for easy identification.
Kick off the creation process and after a while you would have 2 web app running in two geographic regions.

Perfect! Great going 👏
Let's go ahead and create a simple helloworld html page and deploy that to the above app services in both the regions. I have selected Visual Studio for this inorder to publish the web page straight from the IDE. Nothing else. You can make your own choice.
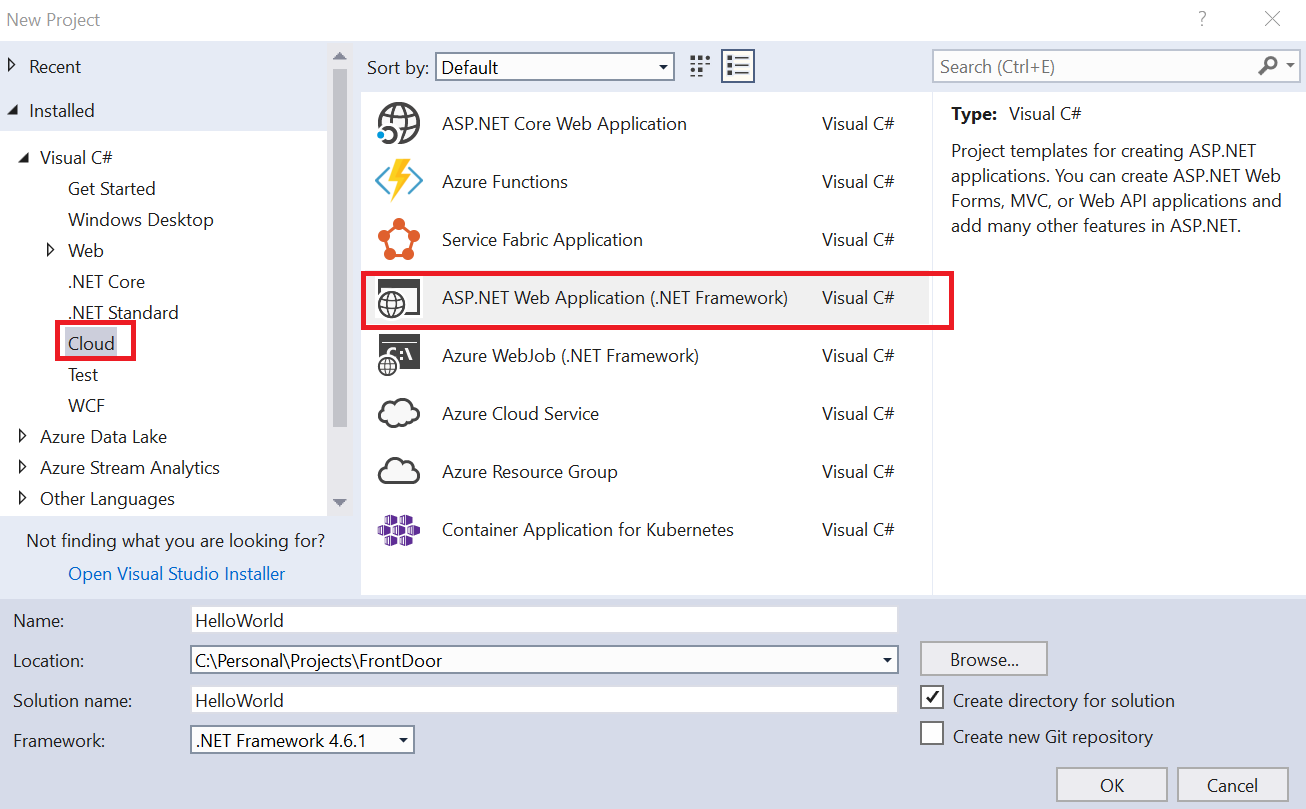
- Fire up Visual Studio and select File >> New >> Project. Select “ASP.NET Web application (.Net Framework)” as your project type. Choose the project name as per your wish (I have given HelloWorld)
Select "Empty" in the next window and click "OK"
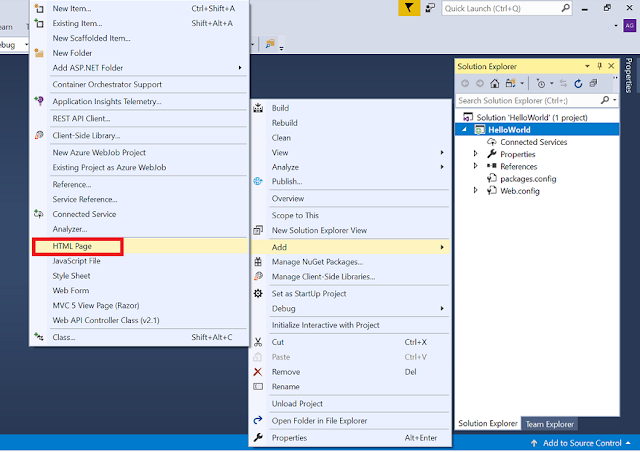
- Right click on the solution and add an HTML page. Give the name "index.html"

- Replace the code of the index page with the following.
<!DOCTYPE html>
<html>
<head>
    <meta charset="utf-8" />
    <title>Hello World !!</title>
</head>
<body>
    <h1>This is a hello world wish from West U.S.</h1>
</body>
</html>
Nothing great in the code. Just a simple hello world wish.
- Publish the page directly from the IDE. Right click on the solution and click "Publish". Make sure you are already logged to your Azure subscription from Visual Studio IDE. Hit "Start" and select the "App Service" and "Select Existing"

- Hit "Publish". Here make sure you select the correct app service. Since our greeting message is from West US, hence select the hello world app service of West US app. This is important.

- Click "OK" and deploy the application to the West US region. The browser url will confirm the correct deployment.

- Now open the index page and change the message to "This is a hello world wish from West Europe" and publish it to the West Europe region the same way you did for US region. This time select the West Europe app service. The browser url will again confirm the correct deployment.

Cool! So now we have our web app running in two different region.
Now let's configure Azure Front Doors Service. Ah! this is what we are waiting for.. right!
- Search for "Front Doors' if it's not already pinned to your left blade.

- Enter the basic information. Select the region as "West US"

- In the "Configuration" blade first configure the Frontend hosts. Click the "+" icon at the top right corner of the blade and enter the host name of your choice. I have given "helloworld-frontdoors". Keep the Session Affinity and Web Application Firewall settings as default disabled. Click "Add"

- Now configure the "backend pools". Click the "+" icon at the top right corner of the blade and provide the name of the pool of your choice. I have given "helloworld-backendpools".

- Click the "+ Add a backend" link and configure the backend app services. Select "App service" from the Backend host type dropdown, your West US app endpoint from the Backend host name dropdown and "Priority" as 1 (signifying primary region). Rest accept as default. Click Add

- Repeat the above step to add another backend pool but this time select your West Europe endpoint as the "Backend host name" and set the "Priority" as 2 (signifying secondary/fail-over region)
- After the setup your backend pool configuration should look similar to the below. Click "Add" to finish the configuration.

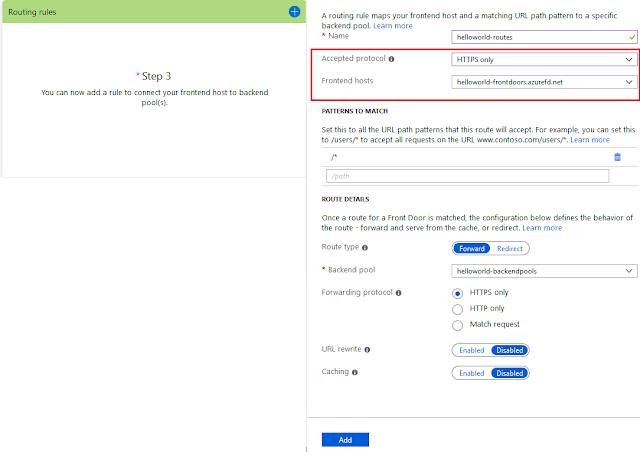
- Now let's configure the route. Click the "+" icon at the top right corner of the blade and provide the rule name of your choice. I have given "helloworld-routes". Select "HTTPS only" from the Accepted protocol dropdown. Notice the system has picked up the front-end hosts name automatically. Accept all other defaults and click "Add"

- The diagram should show similar to this after all the above configurations are in place.

- Click the "Review + create" blade and hit "Create" to finish the Front Doors configuration. Wait for few minutes till it completes.

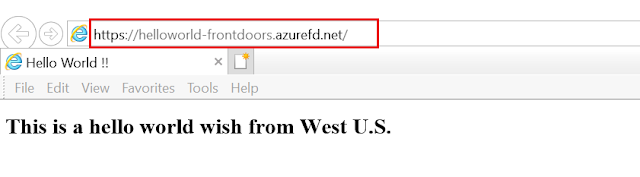
Notice the frontend host url. That is your front doors entry point to the backend world. You might get an 404 error if you hit the url as soon as it is created. Don't worry.. Wait for few moments as its takes some minutes to propagate the effect globally.
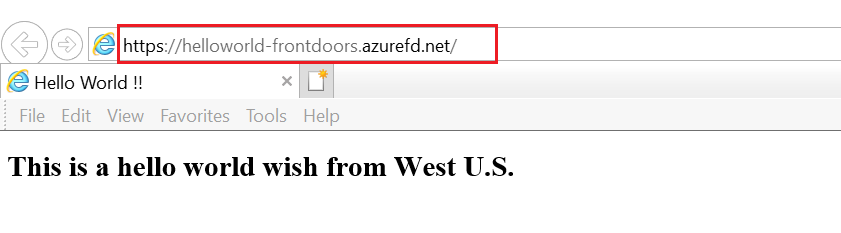
Hitting the front doors url we can see that the hello world message from West US is getting displayed. This means the page is getting served from the West US backend region and we have also made this as our primary region while configuring the front doors service. Great! its working as expected.
Hitting the front doors url multiple times will result in the same result. Our primary region is serving all the user request.
Now lets simulate a fail-over scenario. What if the West US region goes down? The Front Door should automatically fail over to the secondary region (in this case West Europe region) and serve the user request from there; thus ensuring high availability and disaster recovery. We have configured it to behave that way, right!
Go to the West US web app and stop the application. This will simulate the West US outage scenario which we are trying to accomplish.

Now go back to your Front Doors endpoint and hit refresh. You may see that it's still serving from the West US region. This is because the outage has not yet propagated globally. Wait for few minutes. Have patience, it's really quick. 😊
You will see that now the hello world message is getting served from the West Europe region.

Well Done! You have done everything right and the output is as expected. Mission Accomplished. 👍
Hope this article will help to have a good understanding on the Front Doors service and would encourage you to dig further. Do share with me about your experience and what you have built upon this foundation and also let me know if you want me to cover other areas of this service.
I would love to hear from you.
No comments:
Post a Comment