
We will investigate a great feature of this service today. We will
create a sample Web app and an API app, containerize those and will leave it to
the "Web app for containers" service to do all the necessary plumbing
work and making sure our application is up and running. To make it more fun, we
would only make use of Visual Studio mostly in our demo and will only switch
to Azure for customization purpose. Sounds interesting... Let's get started.
Prerequisites:
1. Azure Subscription
(Free subscription of 30 days will also do)
2. Microsoft Visual
Studio 2017
4. Basic C# programming
knowledge
- Open VS 2017 and select File
>> New >> Project. Select ".Net Core" and
"Asp.Net Core Web Application" as the template. I have given the
name "MyWebApp" as the project name, but you are free to give
anything of your choice.

- Select the following in the
next screen. Since this is going to be web application, hence the web
application (model-view-container) option is selected. I have taken
Asp.Net Core 2.1 as the latest version. Leave other parameters as default
and click OK to create the project.

- Right click on the project
to add container orchestrator support as below.

- Select "Docker
Compose" from the drop-down and click OK

- Select target OS as
"Linux" and click OK to complete the process

- Now let's see how VS has
configured our web project. A Docker file got added along with a new
project name docker-compose. The magic here is that our application now has
got docker along with orchestrator support and we do not need to change a
single line of code in any of the files. VS has done all the necessary
handshaking.

Let's add the API project.
- Right click on the solution
and add a new project. I have given the name "MyApiApp" but you
are free to give any name of your choice

- The time select the API as a
template and un-check the HTTPS configuration checkbox as we would not
require it this time.

- Now follow the same steps
you have done to add docker container orchestrator support in this project
as well. Remember... it's the exact same steps. If you have performed it
right, your project structure should look similar to this

- And the docker-compose.yml
should look like this.

Now let's introduce some activity in the boilerplate projects.
Open the Controller/ValuesController.cs file
under the API project and replace the first Get() function with the below code
block. This is just returning the current short time to the calling
application.
// GET api/values
[HttpGet]
public ActionResult<string> Get()
{
return
"" + DateTime.Now.ToShortTimeString();
}
Let's call this api from our web application and display the value
accordingly.
Open the Controller/HomeController.cs file under
the Web project and replace the Index method with the below code block. Here we
are just calling the api app get() method to get the current time and storing
it into a ViewData.
public async Task<IActionResult>
Index()
{
using (var
client = new System.Net.Http.HttpClient())
{
var
request = new System.Net.Http.HttpRequestMessage();
request.RequestUri = new Uri("http://myapiapp/api/values/");
//Docker compose will automatically map the underlying IP
var
response = await client.SendAsync(request);
ViewData["msg"] = "The current time is : " +
response.Content.ReadAsStringAsync().Result;
}
return
View();
}
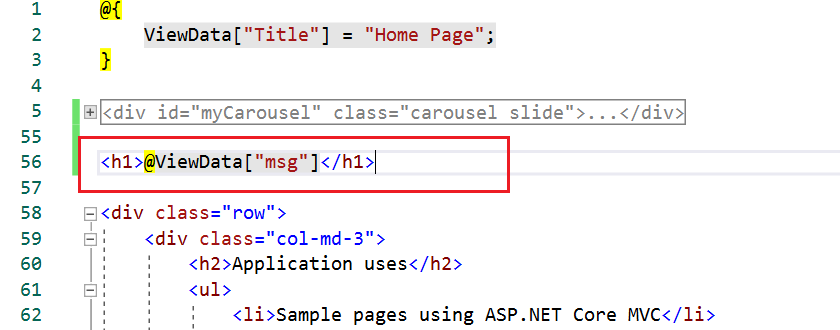
Open the Views/Home/Index.cshtml page and display the ViewData message
just after the Carousel
as below. But yes again you are free to add
this message anywhere in the page.
Done with the local setup. Now press F5 to build and run the solution.
This will now build container images for both of your web and api application
and would launch the project as a container application in a browser. The time
(as highlighted below) is coming from the API get() call. Refresh the page and
you would see new time every minute.

Great... our application is now containerized and working seamlessly
together. What we have done? simply nothing... in fact no docker knowledge
needed. All the heavy-duty work is happening behind the scene 😊
Let's host it in the cloud. Here we need to perform two things
1. Host the docker
images in Azure Container Registry (ACR)
2. Create an Azure Web
App for Containers service to run those images
Make sure you are connected to your Azure subscription from within you
Visual Studio IDE.
Right click on the API project and hit "Publish" from the
context menu and follow the below steps
- Select "Container
Registry" and then "Create New Azure Container Registry".
Click Publish.

- All the fields will be
automatically populated. I preferred to leave the DNS prefix as is (you
can change it as per your convention) for this demo and make sure the
right subscription is selected (in case you have multiple subscriptions).
You can select an existing resource group or create new. I have created a
new one. Select he SKU as Basic as this is enough for this demo and select
the location of your choice. Click "Create"

- Now have some patience.
Azure will create the ACR for you and would also publish the docker image
related to the API app into it. This will take few minutes.
- Once done, do the same
operation for the Web application as well. But this time select the
existing container registry you created in the step one.

- Now Login to Azure (atlast 😉)
- Find your resource group (in
my case it's my-web-app-rg) and click to see the details in
it.
- You will find the container
registry you created
- Click the container
registry. Then click the Repositories (under services) option from the
panel. You must see the two docker images you had just published from your
visual studio

Now we are all set to create a web app which will run these images. No
code or DLLs to deploy. The docker images are self-contained and the rest will
be taken care by the azure platform. Sounds great. So, let's create one.
- Search for "web app for
container" in the Azure search bar and select it

- Fill up the form with the
necessary details and click "Next:Docker".

- Select the values as shown
below. The "docker-compose.yml" configuration file you will find
in your project directory. But before uploading the file you need
to make a very important change. Replace the ${DOCKER_REGISTRY-}
variable with the Azure container registry login server name which you
will find under the overview tab of the ACR (in my case it's myapiapp20200120095948.azurecr.io).
Hence the updated docker-compose.yml
stands like below


- Go to your resource group to
find the below services in there

- Click the web app service
and hit the Url from the Overview page which will launch your web
application in the browser with the time stamp picked up from your API app

Voila!... your web application is now running two container images behind the
scene. You can now leverage the power of both docker and azure web app in
building a robust and scalable application which is totally based on PaaS.
Isn't it a great service?
You can also fully automate the above processes with DevOps. 👍
Congratulations! for coming this far. Hope this article will boost
up your self-confidence and would encourage you to further explore this
service.
Do share with me about your experience and what you have built upon this
foundation. You can take it up to any level and integrate. I would love to hear
from you.