
Take an example (Order handling in an arbitrary eCommerce scenario). The situation is like
- Receiving the order in the system
- Save the order details in a database
- Generate a service ticket (ITSM) so that the order can be handled
- Generate a SMS and send it to the customer confirming the order
A very common workflow..right! What would you prefer here? A DevOps Automation or an Workflow Automation? Obviously the second one, and here in this article we will implement the above scenario with the help of a Logic App workflow and would try to feel the power of this awesome service.
Please note that for simplicity purpose and to make this article an easy read we will go over a waterfall workflow model with sequential steps.
Let's revisit out scenario once again and this time we will put the integration pointers.
- Receiving the order in the system 👉 Postman REST API client
- Save the order details in a database 👉 Azure Table Storage
- Generate a service ticket (ITSM) so that the order can be handled 👉 FreshDesk (free account will do)
- Generate a SMS and send it to the customer confirming the order 👉 Twillio (free account will do)
Make sure you have the above settings done before moving forward.
OK, now we are all set. Let's dive.
- First let's define the order information. We will use a simple JSON payload here for this demo just to simulate an order. Please replace the phone number with yours (with proper +Country code) 📱
{
   "orderNo": "1",
   "orderItem" : "Headphone",
   "orderCustName": "My Good Customer",
   "orderCustMobile" : "+91XXXXXXXXXX",
   "orderCity": "Bangalore",
   "orderState": "Karnataka"
}
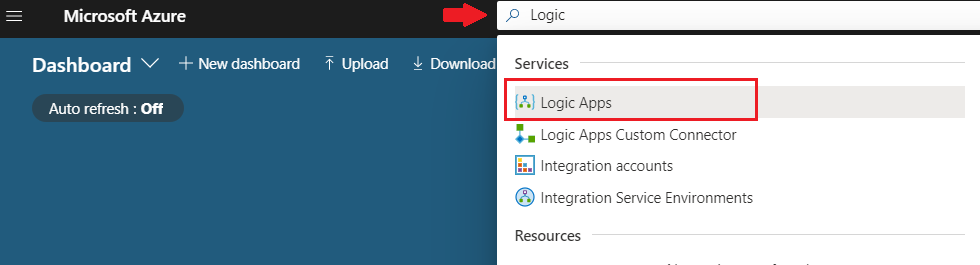
- Login to Azure and search for Logic Apps.
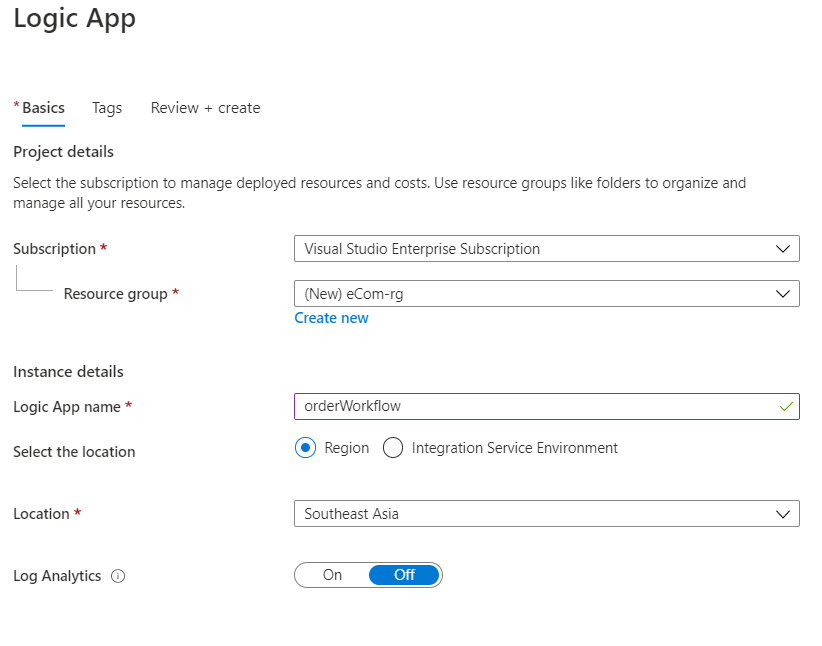
- Select your subscription, fill up the necessary details as per your choice, review and create the logic app.
- Select "When a HTTP request is received" trigger in the designer

- Click the link "Use sample payload to generate schema" hyperlink at the bottom and paste the order JSON payload to generate the JSON schema. Save the logic app to generate the HTTP Post Url.

- Click "+ New Step" to add an Azure Storage table data insert step. Make sure you have already created a blank table in Azure Storage account so that you can insert data in that table directly using this step. You can create that table from Logic app as well, but it's upto you. Here I have already created that table inorder to reduce an extra step
Search for Azure Table Storage and select "Insert Entity" action

- Give a name for your table storage connection, select your storage account and hit "Create"

- Select your table name from the Table dropdown. Paste the JSON payload here and replace the values with the parameters from the dynamic content selection box. As we are saving data in Azure Storage Table so make sure to modify your payload with PartitionKey and RowKey parameters to make an unique combination for each row item. I have used the orderNo and orderCustMobile fields but you can make your wish here 😐

- Click "+ New Step" to add a FreshDesk service ticket action.
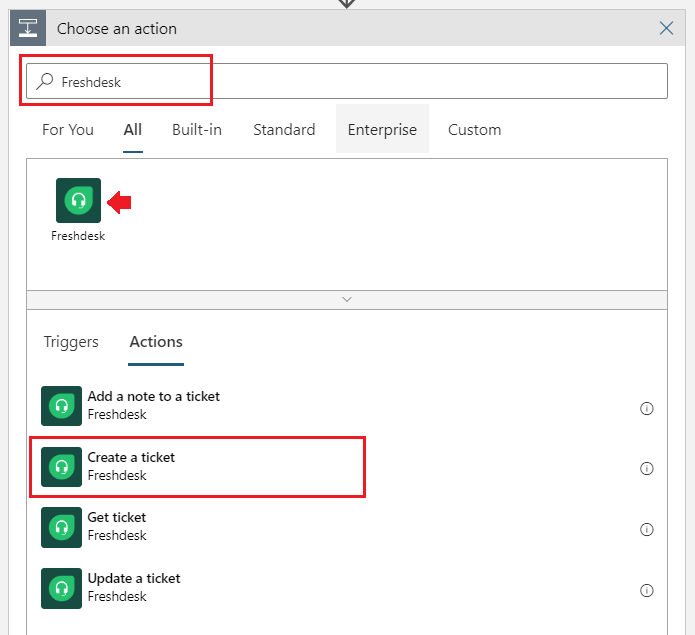
- Provide your FreshDesk connection parameters and hit Create

- Fill up the ticket details to be logged. You can decorate it as per your requirement. For the Email dropdown choose any dummy name as it doesn't matter for this demo. In real life scenario you will be having your user list. Here our purpose is to log a service ticket.

- Click "+ New Step" to add a Twilio SMS action. Select "Send Text Message (SMS)" action

- Enter the Connection Name of your choice, Twilio Account id (the ACCOUNT SID value in the Twilio portal) and the Twilio Access Token (the AUTH TOKEN value in the Twilio portal) and hit "Create"

- Select the From Phone number which will be automatically populated from your Twilio account. Decorate your SMS message as you wish.

- Click "Save" at the top to save your logic app. This step is very important 😀
Show Time !!!!!!!
Copy the Http POST Url from the first step of your logic app and open postman. We are about to make a rest call.
Paste the Url at the address bar, select JSON (application/json) as content type and put your JSON payload in the body as raw input. Hit Send to get a 202 Accepted response back.

You have successfully made a rest call. Now three activities should happen. We must receive a record in table storage, service ticket logged in FreshDesk and a SMS in our mobile phone.
Open Azure Storage explorer and Aha! we have a new record in table

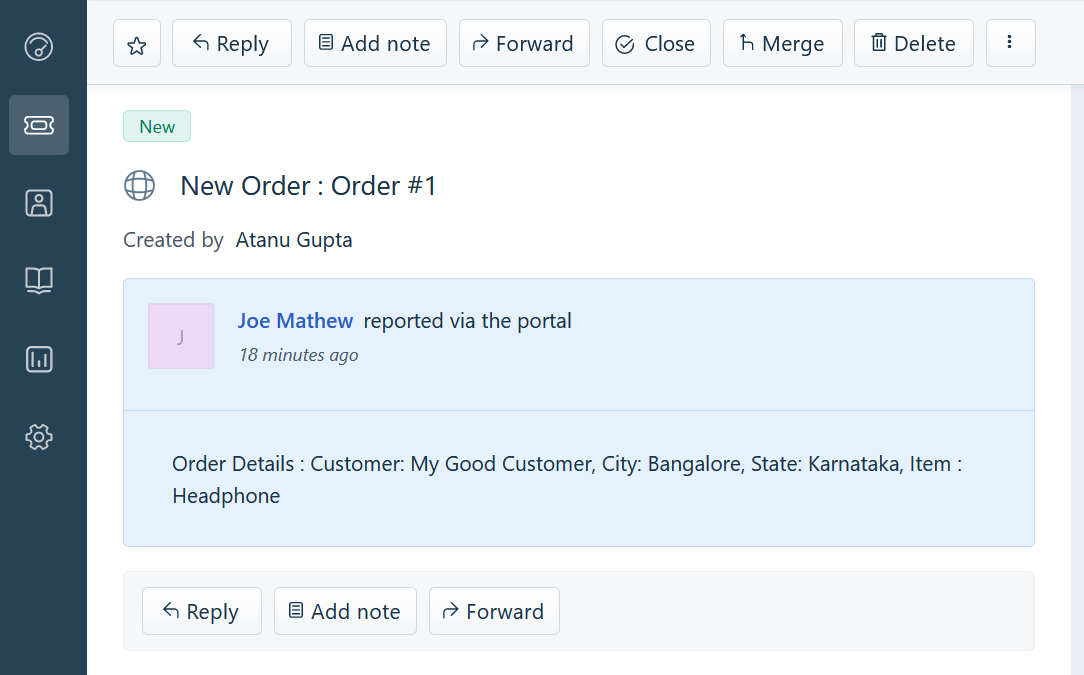
Open your FreshDesk ticketing dashboard and Voila! we have new service ticket 😲
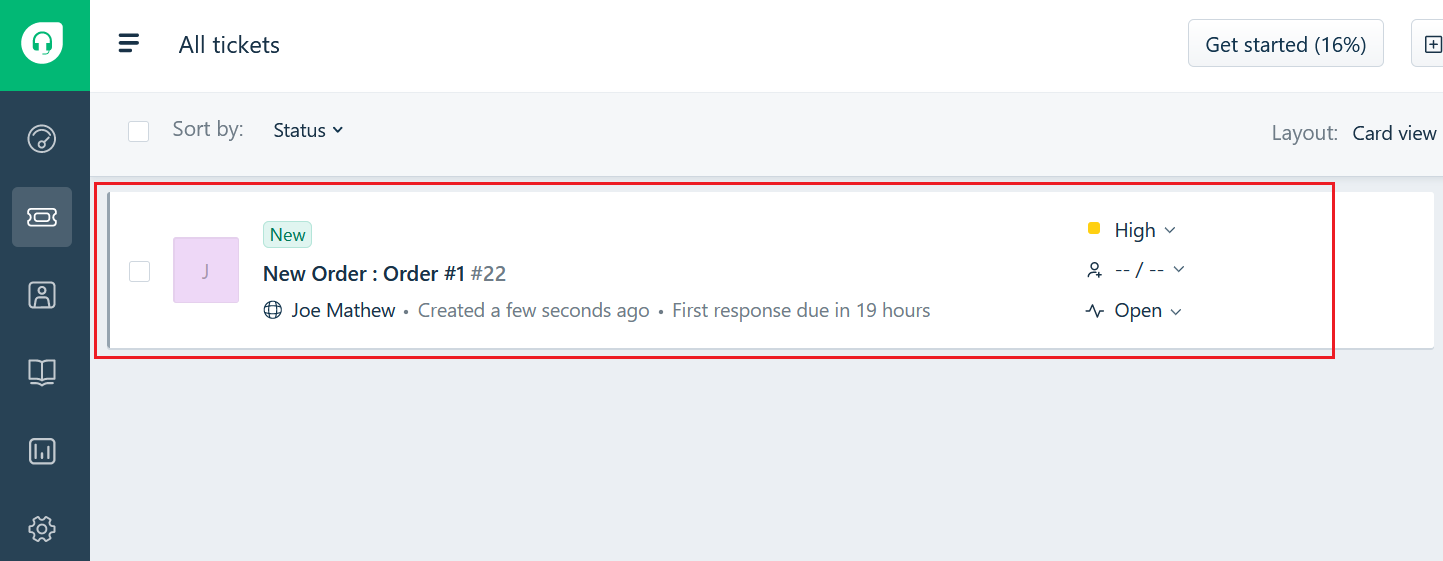
Click the ticket and drill down to its details. Yep it showing the order details just as we configured it to be 👍
Awesome!... now as a last step lets check the mobile phone only to find the SMS sitting in our inbox. Now how cool is that !!!!!!!! 👏👏👏

We have successfully achieved our goal and the power of logic app simply drives us crazy. We have achieved a complicated, cost-effective and integrated solution using the serverless flavour of Azure with NO CODE. Good job!
Congratulations! for coming this far. Hope this article will help you to further explore this feature.
Do share with me about your experience and what you have built upon this
foundation. You can take it up to any level and integrate. I would love
to hear from you.


